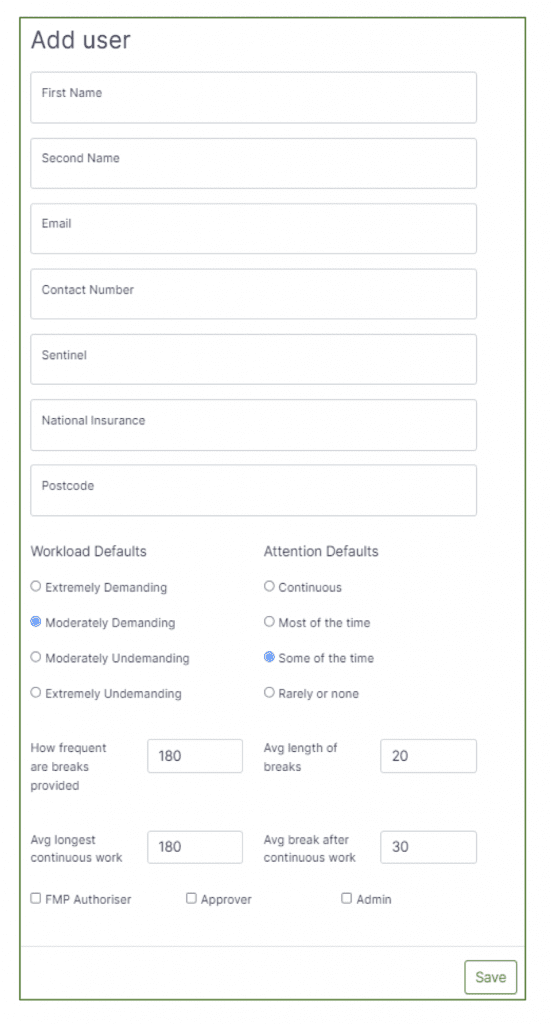
Click on the “Add” button in the top right-hand corner
Complete the Add User form that opens up.
A Sentinel Number and / or the National Insurance Number must be added.
The Postcode used will become the default home location when planning shifts for this worker
Workload Defaults and Attention Defaults should be selected for each worker.
The data in the ‘Breaks’ section are defined in total number of ‘minutes.’
These can be changed and will become defaults when planning shifts for the worker.
They can also be amended when planning individual shifts for this worker.
Set the access requirements for the worker. If they are to be a ‘User’ of the system only do not check any of these.
Once all data has been added click ‘Save’.
The system will now send an email to the worker requesting them to confirm their email address, set a password and download the App.
Defining a User’s Access
All persons added as a ‘User’ to the system will be able to access the mobile App.
FMP Authoriser
these users will normally be managers or supervisors who are authorised to approve Fatigue Management Plans.
Approver
Approvers are likely to be supervisors or managers with the authority to either Approve or Reject a worker’s exceedance to planned working hours.
Admin
Admins users are permitted access to the web-database for the purpose of:
Adding and editing all users
Adding, editing, and deleting projects
Creating Fatigue Management Plans (FMP’s)
Account Management
Running reports
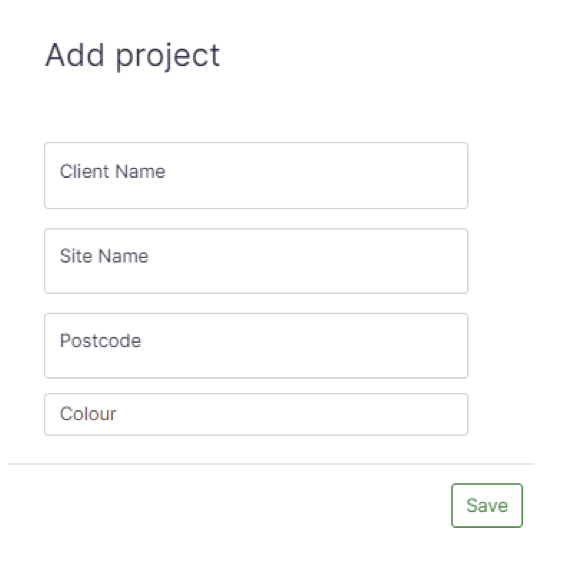
Adding a Project
Click on the ‘Projects’ button in the top ribbon
Click on the “Add” button in the top right-hand corner
Populate the 4 fields with basic project information
Client Name
Site Name
Site Postcode
Then choose a colour for the project. This colour will show on all diary entries.
Click Save
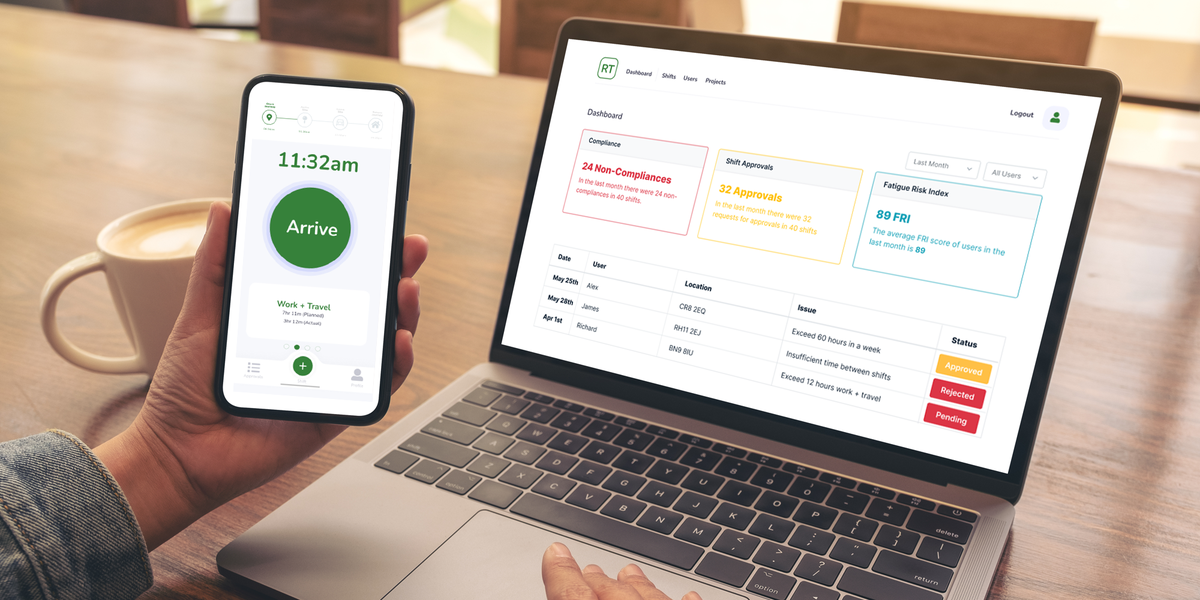
The Diary Calendar
Click on the ‘Shifts’ button in the top ribbon
This will open the Planning Calendar on the current month.
Navigate through the calendar using the < or > buttons or the @Today@ button.
To view a specific day, click on ‘View Day’ button then navigate through using the < and > buttons.
To view on a specific week click the ‘View Week Button then navigate through using the < and > buttons.
Adding a Shift to the Calendar
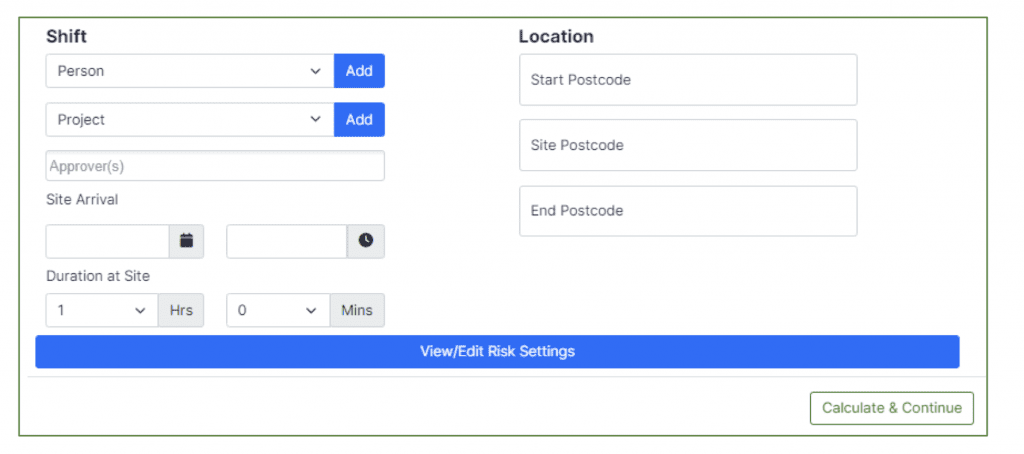
To add a shift you have two options: 1. Click on the ‘Create new Shift ’button, or,
2. Click on the ‘+’ symbol on any given day within the calendar
Option 1:
Click on the ‘Create new Shift’ button
This opens a new window – see below
3. Add the worker form the drop-down list
4. Choose the project from the drop-down list
5. Select an ‘Approver’ from the drop-down list – note this is a person authorised to approve/ reject exceedances in planned working times
6. Use the date picker to choose the ‘Date’ that the shift starts
7. Use the time picker to select the ‘Time’ the shift is to start.
8. Note that the locations populate with the default postcodes set when you added the Worker and the Project – these can be edited if required.
9. Click on the Blue Bar if you want to change the pre-set defaults which were set when you added the worker
10. Click ‘Calculate and Continue’
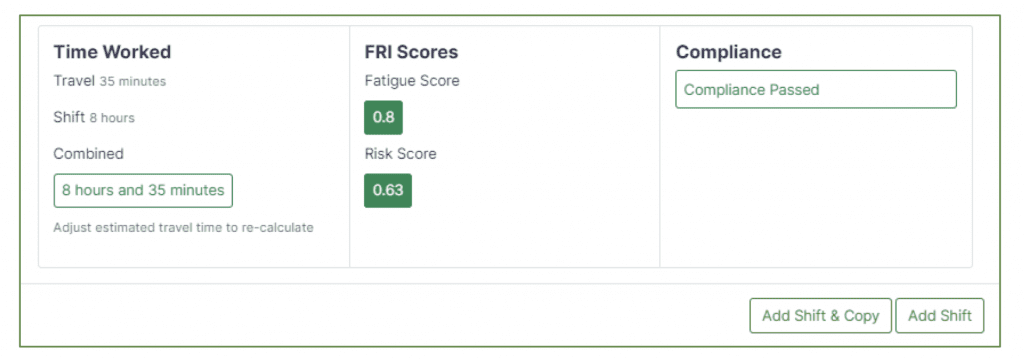
11. The screen will expand and provide you with a. TravelTime b. Shift Duration c. Combined shift and travel time d. FatigueScore e. Risk Score f. Compliance Status
12. If correct, click ‘Add Shift’. The shift will now be added to the calendar and sent to the workers mobile device.
13. Clicking ‘Add Shift & Copy’ will
Add the planned shift to the calendar
Reopen the planner with the same details to allow a new shift to
be planned on a different day using the same criteria
Option 2:
Clicking on the ‘+’ button on a given day within the calendar will follow the same sequence as above but with the ‘date’ pre-populated.
Viewing Planned Shifts in the Calendar
Once a shift has been added to the calendar it will show with the project colour next to it.
Clicking on a shift will bring up the following window
View & Edit a Shift
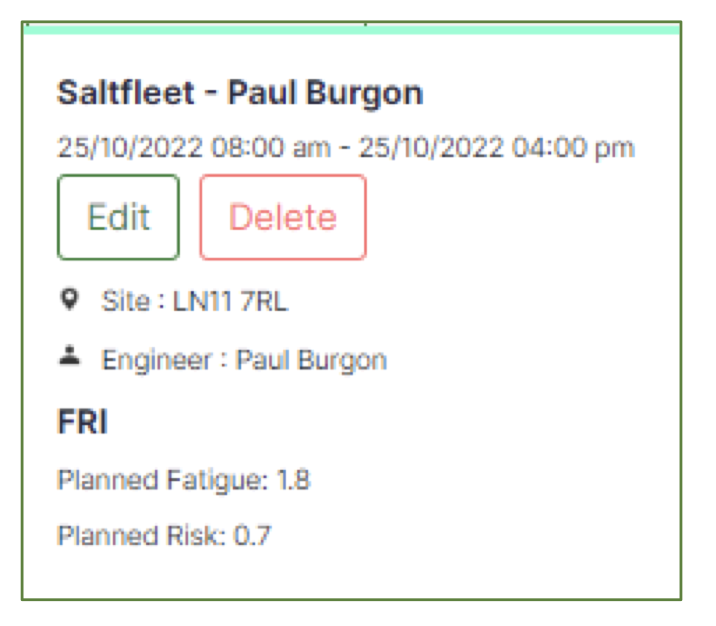
Clicking on any shift in the diary will open a window showing details of the planned shift.If the shift has not started the Edit & Delete options will show.
Clicking Edit will open a new window where you can amend the shift details.
Clicking Delete will allow the shift to be removed from the calendar.
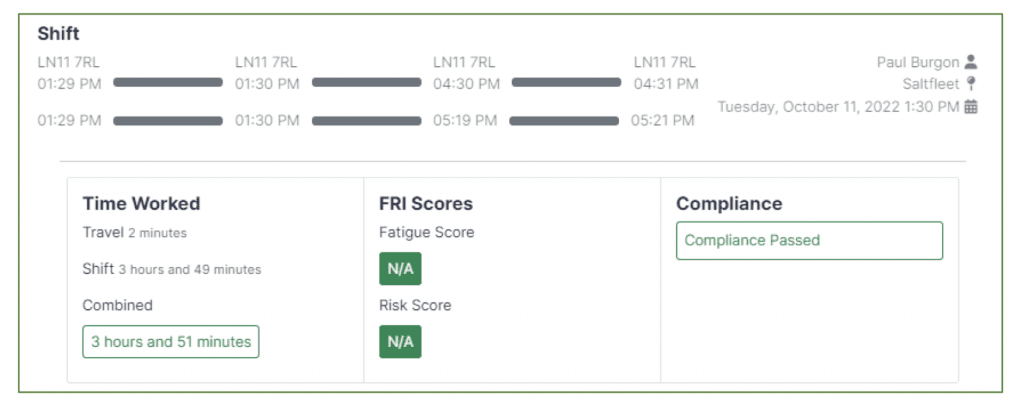
If the shift has already started, then the ‘Edit & Delete’ options are no longer available and replaced with ‘View’. Clicking ‘View’ opens a new window showing the screenshot below. This gives the planned times of the shift and the actual times worked and travelled by the user.
The FRI score will display the FRI scores based on the actual hours worked.
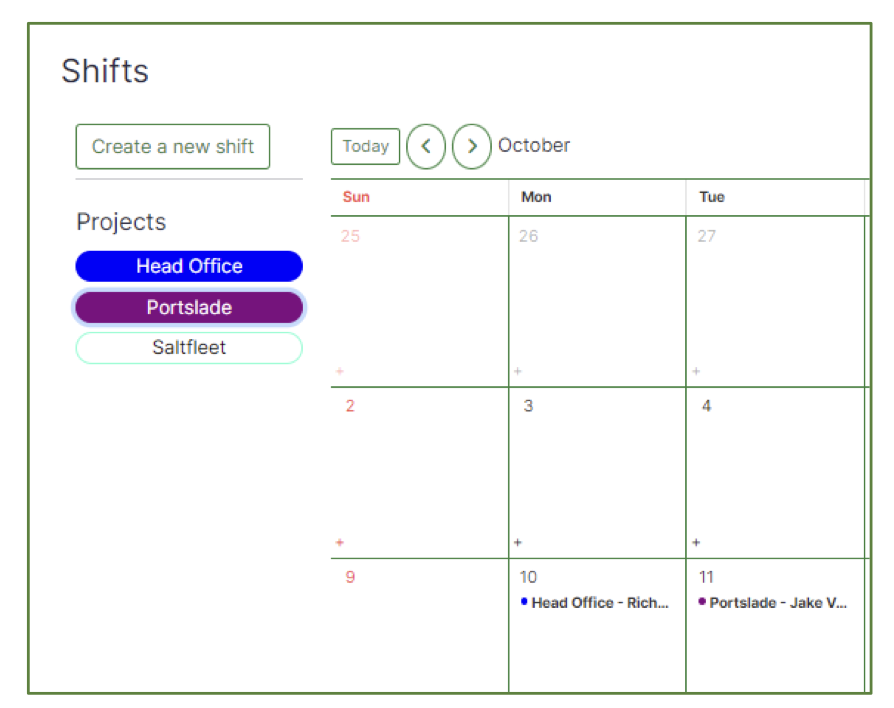
Viewing Projects in the Calendar
There is an option to view all planned shifts against a specific project.
The projects are listed in the calendar on the left-hand side, clicking on one of these will remove those projects from the calendar, leaving only those required.
audit fri
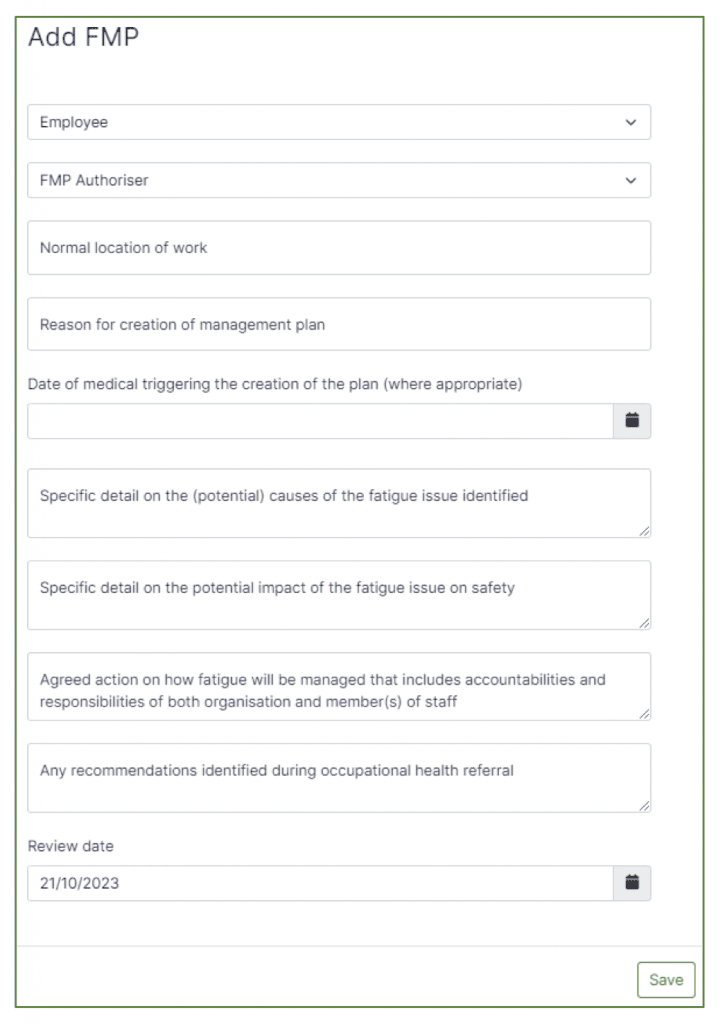
Creating a Fatigue Management Plan (FMP)
Using the FMP button on the top ribbon will open the Fatigue Management Plan (FMP) log.
To create a new FMP click the ‘Add’ button – the following window will open.
Complete the FMP form as required, providing responses to each of the questions asked.
Once complete, click ‘Save’.
Rail-Time will now send a copy of the completed form to the FMP Approver who should then Approve or Reject.
Approved FMP’s are then saved in the Log and a copy is sent to the worker.
Rejected FMP’s are returned to the author for amendment.
The status of the FMP is shown in the Log
Each FMP must be given a review date. Rail-Time will issue a reminder when the review date is approaching. The FMP can be edited where a change is required by clicking on the ‘Action’ button in the FMP Log